总目录:wxPython 教程目录
本节内容:wxPython 高级 widgets
本节译自:zetcode
上一篇:wxPython 教程 (七): 部件
下一篇:wxPython 教程 (九): 拖拽
动态语言使用简单,非常便于原型设计、内部开发以及学习编程。如果需要快速的解决方案或者在短期内就会更改的应用,使用动态语言更优于编译语言。相反,如果我们开发资源密集型应用、游戏以及高质量多媒体应用,那么使用 C 是最正确的选择。
本节,主要讲解多个 wxPython 高级 widgets 。wxPython 有很多有名的高级 widgets, 比如 树形 widget、HTML 窗口、 网格 widget、列表框 widget 甚至具有高级样式编排能力的编辑器 widget。
wx.ListBox
wx.ListBox 用来展示和操作一组列表项,正如其名所示,它有一个矩形框,里面有一组字符串。我们可以用它来展示一列 MP3 文件、书名、大项目的模块名或者一堆朋友的名字。 wx.ListBox 可以有两种形式,一种单选一种多选,单选是默认形式。wx.ListBox 有两个可触发事件,一个是 wx.EVT_COMMAND_LISTBOX_SELECTED 事件,当我们选择列表中的一个字符串时会触发这一事件;另一个是 wx.EVT_COMMAND_LISTBOX_DOUBLE_CLICKED,当我们双击一个条目时会触发该事件。wx.ListBox 中条目的个数在 GTK 平台是有限制的,根据文档,大概是 2000 左右,需要滚动时会自动展示滚动条。
wx.ListBox widget 构造函数如下:
 wx.ListBox(wx.Window parent, int id=-1, wx.Point pos=wx.DefaultPosition,
     wx.Size size=wx.DefaultSize, list choices=[], long style=0,
     wx.Validator validator=wx.DefaultValidator, string name=wx.ListBoxNameStr)
其中有一个 choices 选项,可以作为展示的 list,默认为空。
#!/usr/bin/python

# listbox.py

import wx

ID_NEW = 1
ID_RENAME = 2
ID_CLEAR = 3
ID_DELETE = 4


class ListBox(wx.Frame):
    def __init__(self, parent, id, title):
        wx.Frame.__init__(self, parent, id, title, size=(350, 220))

        panel = wx.Panel(self, -1)
        hbox = wx.BoxSizer(wx.HORIZONTAL)

        self.listbox = wx.ListBox(panel, -1)
        hbox.Add(self.listbox, 1, wx.EXPAND | wx.ALL, 20)

        btnPanel = wx.Panel(panel, -1)
        vbox = wx.BoxSizer(wx.VERTICAL)
        new = wx.Button(btnPanel, ID_NEW, 'New', size=(90, 30))
        ren = wx.Button(btnPanel, ID_RENAME, 'Rename', size=(90, 30))
        dlt = wx.Button(btnPanel, ID_DELETE, 'Delete', size=(90, 30))
        clr = wx.Button(btnPanel, ID_CLEAR, 'Clear', size=(90, 30))

        self.Bind(wx.EVT_BUTTON, self.NewItem, id=ID_NEW)
        self.Bind(wx.EVT_BUTTON, self.OnRename, id=ID_RENAME)
        self.Bind(wx.EVT_BUTTON, self.OnDelete, id=ID_DELETE)
        self.Bind(wx.EVT_BUTTON, self.OnClear, id=ID_CLEAR)
        self.Bind(wx.EVT_LISTBOX_DCLICK, self.OnRename)

        vbox.Add((-1, 20))
        vbox.Add(new)
        vbox.Add(ren, 0, wx.TOP, 5)
        vbox.Add(dlt, 0, wx.TOP, 5)
        vbox.Add(clr, 0, wx.TOP, 5)

        btnPanel.SetSizer(vbox)
        hbox.Add(btnPanel, 0.6, wx.EXPAND | wx.RIGHT, 20)
        panel.SetSizer(hbox)

        self.Centre()
        self.Show(True)

    def NewItem(self, event):
        text = wx.GetTextFromUser('Enter a new item', 'Insert dialog')
        if text != '':
            self.listbox.Append(text)

    def OnRename(self, event):
        sel = self.listbox.GetSelection()
        text = self.listbox.GetString(sel)
        renamed = wx.GetTextFromUser('Rename item', 'Rename dialog', text)
        if renamed != '':
            self.listbox.Delete(sel)
            self.listbox.Insert(renamed, sel)


    def OnDelete(self, event):
        sel = self.listbox.GetSelection()
        if sel != -1:
            self.listbox.Delete(sel)

    def OnClear(self, event):
        self.listbox.Clear()


app = wx.App()
ListBox(None, -1, 'ListBox')
app.MainLoop()
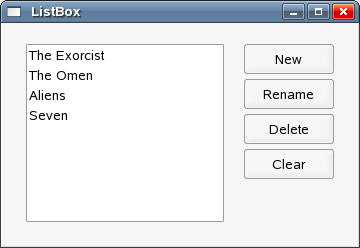
在我们的例子中,有 1 个 listbox 和 4 个 buttons,每个 button 对应一个不同的方法。调用 Append() 方法可以在列表中增加条目, Delete() 可以删除条目, Clear() 可以清空条目。
self.listbox = wx.ListBox(panel, -1)
hbox.Add(self.listbox, 1, wx.EXPAND | wx.ALL, 20)
我们创建了一个空的 wx.ListBox,边框是 20px。
self.Bind(wx.EVT_LISTBOX_DCLICK, self.OnRename)
我们绑定了 使用 wx.EVT_LISTBOX_DCLICK 绑定器将 wx.EVT_COMMAND_LISTBOX_DOUBLE_CLICKED 事件绑定至 OnRename() 方法。当用户双击特定元素时将弹出一个重命名对话框。
def NewItem(self, event):
    text = wx.GetTextFromUser('Enter a new item', 'Insert dialog')
    if text != '':
        self.listbox.Append(text)
点击 New 按钮时,NewItem() 被调用,将展示一个 wx.GetTextFromUser 对话框,该对话框返回用户的输入。如果输入非空,我们使用 Append() 将其添加至 listbox。
def OnDelete(self, event):
    sel = self.listbox.GetSelection()
    if sel != -1:
        self.listbox.Delete(sel)
删除一个 item 分两步。首先使用 GetSelection() 获取被选择条目的 index,然后将 index 作为参数传入 Delete() 方法删除该元素。
self.listbox.Delete(sel)
self.listbox.Insert(renamed, sel)
wx.ListBox 部件没有 Rename() 方法,所以我们删除之前选择的字符串,然后在原来的地方插入一个新的字符串。
def OnClear(self, event):
    self.listbox.Clear()
清空 listbox 比较简单,我们简单调用 Clear() 即可。

图:wx.ListBox 部件
wx.html.HtmlWindow 部件
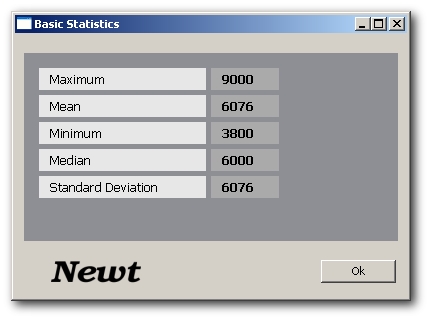
wx.html.HtmlWindow 部件可以展示 HTML 页面,它不是一个完整成熟的浏览器,但我们可以使用它做很多有意思的事情。
#!/usr/bin/python

import wx
import wx.html as html

ID_CLOSE = 1

page = \'<html><body bgcolor="#8e8e95">\
<table cellspacing="5" border="0" width="250"> \
<tr width="200" align="left"> \
<td bgcolor="#e7e7e7">  Maximum</td> \
<td bgcolor="#aaaaaa">  <b>9000</b></td> \
</tr> \
<tr align="left"> \
<td bgcolor="#e7e7e7">  Mean</td> \
<td bgcolor="#aaaaaa">  <b>6076</b></td>\
</tr> \
<tr align="left"> \
<td bgcolor="#e7e7e7">  Minimum</td> \
<td bgcolor="#aaaaaa">  <b>3800</b></td> \
</tr> \
<tr align="left"> \
<td bgcolor="#e7e7e7">  Median</td> \
<td bgcolor="#aaaaaa">  <b>6000</b></td> \
</tr> \
<tr align="left"> \
<td bgcolor="#e7e7e7">  Standard Deviation</td> \
<td bgcolor="#aaaaaa">  <b>6076</b></td> \
</tr> \
</body></table>\
</html>\'


class MyFrame(wx.Frame):
    def __init__(self, parent, id, title):
        wx.Frame.__init__(self, parent, id, title, size=(400, 290))

        panel = wx.Panel(self, -1)

        vbox = wx.BoxSizer(wx.VERTICAL)
        hbox = wx.BoxSizer(wx.HORIZONTAL)

        htmlwin = html.HtmlWindow(panel, -1, style=wx.NO_BORDER)
        htmlwin.SetBackgroundColour(wx.RED)
        htmlwin.SetStandardFonts()
        htmlwin.SetPage(page)

        vbox.Add((-1, 10), 0)
        vbox.Add(htmlwin, 1, wx.EXPAND | wx.ALL, 9)

        bitmap = wx.StaticBitmap(panel, -1, wx.Bitmap('images/newt.png'))
        hbox.Add(bitmap, 1, wx.LEFT | wx.BOTTOM | wx.TOP, 10)
        buttonOk = wx.Button(panel, ID_CLOSE, 'Ok')

        self.Bind(wx.EVT_BUTTON, self.OnClose, id=ID_CLOSE)

        hbox.Add((100, -1), 1, wx.EXPAND | wx.ALIGN_RIGHT)
        hbox.Add(buttonOk, flag=wx.TOP | wx.BOTTOM | wx.RIGHT, border=10)
        vbox.Add(hbox, 0, wx.EXPAND)

        panel.SetSizer(vbox)
        self.Centre()
        self.Show(True)

    def OnClose(self, event):
        self.Close()

app = wx.App(0)
MyFrame(None, -1, 'Basic Statistics')
app.MainLoop()

图:wx.ListBox 部件
Help 窗口
我们可以使用 wx.html.HtmlWindow 提供帮助窗口,该窗口可以是一个独立的 window 或者是应用的一部分。下面的例子展示了后者的使用:
#!/usr/bin/python

# helpwindow.py

import wx
import wx.html as html

class HelpWindow(wx.Frame):
    def __init__(self, parent, id, title):
        wx.Frame.__init__(self, parent, id, title, size=(570, 400))

        toolbar = self.CreateToolBar()
        toolbar.AddLabelTool(1, 'Exit', wx.Bitmap('icons/exit.png'))
        toolbar.AddLabelTool(2, 'Help', wx.Bitmap('icons/help.png'))
        toolbar.Realize()

        self.splitter = wx.SplitterWindow(self, -1)
        self.panelLeft = wx.Panel(self.splitter, -1, style=wx.BORDER_SUNKEN)

        self.panelRight = wx.Panel(self.splitter, -1)
        vbox2 = wx.BoxSizer(wx.VERTICAL)
        header = wx.Panel(self.panelRight, -1, size=(-1, 20))
        header.SetBackgroundColour('#6f6a59')
        header.SetForegroundColour('WHITE')
        hbox = wx.BoxSizer(wx.HORIZONTAL)

        st = wx.StaticText(header, -1, 'Help', (5, 5))
        font = st.GetFont()
        font.SetPointSize(9)
        st.SetFont(font)
        hbox.Add(st, 1, wx.TOP | wx.BOTTOM | wx.LEFT, 5)

        close = wx.BitmapButton(header, -1, wx.Bitmap('icons/fileclose.png', wx.BITMAP_TYPE_PNG),
		style=wx.NO_BORDER)
        close.SetBackgroundColour('#6f6a59')
        hbox.Add(close, 0)
        header.SetSizer(hbox)

        vbox2.Add(header, 0, wx.EXPAND)

        help = html.HtmlWindow(self.panelRight, -1, style=wx.NO_BORDER)
        help.LoadPage('help.html')
        vbox2.Add(help, 1, wx.EXPAND)
        self.panelRight.SetSizer(vbox2)
        self.panelLeft.SetFocus()

        self.splitter.SplitVertically(self.panelLeft, self.panelRight)
        self.splitter.Unsplit()

        self.Bind(wx.EVT_BUTTON, self.CloseHelp, id=close.GetId())
        self.Bind(wx.EVT_TOOL, self.OnClose, id=1)
        self.Bind(wx.EVT_TOOL, self.OnHelp, id=2)

        self.Bind(wx.EVT_KEY_DOWN, self.OnKeyPressed)

        self.CreateStatusBar()

        self.Centre()
        self.Show(True)

    def OnClose(self, event):
        self.Close()

    def OnHelp(self, event):
        self.splitter.SplitVertically(self.panelLeft, self.panelRight)
        self.panelLeft.SetFocus()

    def CloseHelp(self, event):
        self.splitter.Unsplit()
        self.panelLeft.SetFocus()

    def OnKeyPressed(self, event):
        keycode = event.GetKeyCode()
        if keycode == wx.WXK_F1:
            self.splitter.SplitVertically(self.panelLeft, self.panelRight)
            self.panelLeft.SetFocus()


app = wx.App()
HelpWindow(None, -1, 'HelpWindow')
app.MainLoop()
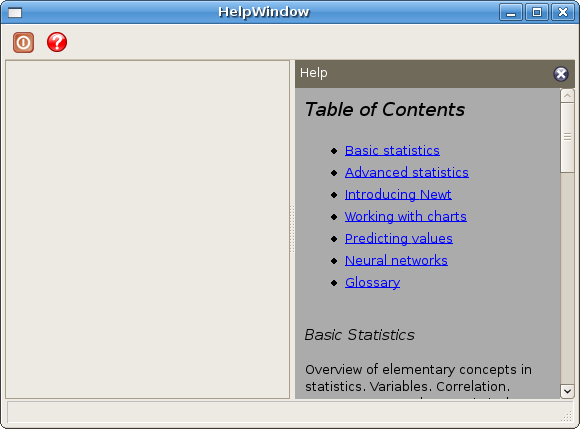
开始时,帮助窗口是隐藏的,点击工具栏的帮助页面或者按 F1 键,即可在右侧显示帮助窗口,点击关闭按钮可以关闭帮助窗口。
self.splitter.SplitVertically(self.panelLeft, self.panelRight)
self.splitter.Unsplit()
我们竖直分割出一个 panel, 然后调用 Unsplit() 方法,该方法会默认隐藏右侧或底部的窗格。
我们将右侧的 panel 划分为 2 个部分,即 header 和 body。头部包含静态文本和一个 bitmap 按钮, body 部分则放置了一个 wx.html.Window。
close = wx.BitmapButton(header, -1, wx.Bitmap('icons/fileclose.png', wx.BITMAP_TYPE_PNG),
    style=wx.NO_BORDER)
close.SetBackgroundColour('#6f6a59')
该 bitmap 按钮的 style 被设置为 wx.NO_BORDER,背景色被设置为 header panel 的颜色,这样可以使得该按钮看起来属于 header 的一部分。
help = html.HtmlWindow(self.panelRight, -1, style=wx.NO_BORDER)
help.LoadPage('help.html')
在右侧,我们新建了一个 wx.html.HtmlWindow 部件,HTML 代码被放置在单独的文件中,使用 LoadPage() 方法获取 HTML 代码。
self.panelLeft.SetFocus()
我们让左侧面板获取焦点,为了能让键盘控制窗口(F1 打开帮助窗口),它必须拥有焦点。
def OnHelp(self, event):
    self.splitter.SplitVertically(self.panelLeft, self.panelRight)
    self.panelLeft.SetFocus()
调用 OnHelp() 可以竖直分出两个 panel,从而显示出 帮助窗口,别忘了让左侧的 panel 聚焦,因为分割窗口会让它失去初始的焦点。
下面是我们的应用中载入的 html 页面。
<html>

<body bgcolor="#ababab">
<h4>Table of Contents</h4>

<ul>
<li><a href="#basic">Basic statistics</a></li>
<li><a href="#advanced">Advanced statistics</a></li>
<li><a href="#intro">Introducing Newt</a></li>
<li><a href="#charts">Working with charts</a></li>
<li><a href="#pred">Predicting values</a></li>
<li><a href="#neural">Neural networks</a></li>
<li><a href="#glos">Glossary</a></li>
</ul>

<p>
<a name="basic">
<h6>Basic Statistics</h6>
Overview of elementary concepts in statistics.
Variables. Correlation. Measurement scales. Statistical significance.
Distributions. Normality assumption.
</a>
</p>

<p>
<a name="advanced">
<h6>Advanced Statistics</h6>
Overview of advanced concepts in statistics. Anova. Linear regression.
Estimation and  hypothesis testing.
Error terms.
</a>
</p>

<p>
<a name="intro">
<h6>Introducing Newt</h6>
Introducing the basic functionality of the Newt application. Creating sheets.
Charts. Menus and Toolbars. Importing data. Saving data in various formats.
Exporting data. Shortcuts. List of methods.
</a>
</p>

<p>
<a name="charts">
<h6>Charts</h6>
Working with charts. 2D charts. 3D charts. Bar, line, box, pie, range charts.
Scatterplots. Histograms.
</a>
</p>

<p>
<a name="pred">
<h6>Predicting values</h6>
Time series and forecasting. Trend Analysis. Seasonality. Moving averages.
Univariate methods. Multivariate methods. Holt-Winters smoothing.
Exponential smoothing. ARIMA. Fourier analysis.
</a>
</p>

<p>
<a name="neural">
<h6>Neural networks</h6>
Overview of neural networks. Biology behind neural networks.
Basic artificial Model. Training. Preprocessing. Postprocessing.
Types of neural networks.
</a>
</p>

<p>
<a name="glos">
<h6>Glossary</h6>
Terms and definitions in statistics.
</a>
</p>

</body>
</html>
<li><a href="#basic">Basic statistics</a></li>
...
<a name="basic">
上面的语句,我通常会写成
<div id="basic">...</div>
,但 wx.html.HtmlWindow 仅支持标准 HTML 标记的一部分子集,需要注意。

图:帮助窗口
wx.ListCtrl 部件
wx.ListCtrl 是一列条目的图形展示部件。 wx.ListBox 尽可以展示一列内容,而 wx.ListCtrl 则可以展示多列。wx.ListCtrl 是一个非常常见和有用的窗口部件。比如一个文件管理器使用 wx.ListCtrl 可以展示文件系统的文件夹和文件,一个 CD 刻录软件使用该部件展示将被刻录到 CD 的文件。
wx.ListCtrl 有三种不同的使用格式:列表视图、报告视图和图标视图,分别通过 style 参数:wx.LC_REPORT、wx.LC_LIST 和 wx.LC_ICON 来控制。
详尽的 style 包括:
- wx.LC_LIST
- wx.LC_REPORT
- wx.LC_VIRTUAL
- wx.LC_ICON
- wx.LC_SMALL_ICON
- wx.LC_ALIGN_LEFT
- wx.LC_EDIT_LABELS
- wx.LC_NO_HEADER
- wx.LC_SORT_ASCENDING
- wx.LC_SORT_DESCENDING
- wx.LC_HRULES
- wx.LC_VRULES
简单例子
第一个例子我们首先减少了 wx.ListCtrl 的基本功能。
#!/usr/bin/python

# actresses.py

import wx
import sys

packages = [('jessica alba', 'pomona', '1981'), ('sigourney weaver', 'new york', '1949'),
    ('angelina jolie', 'los angeles', '1975'), ('natalie portman', 'jerusalem', '1981'),
    ('rachel weiss', 'london', '1971'), ('scarlett johansson', 'new york', '1984' )]


class Actresses(wx.Frame):
    def __init__(self, parent, id, title):
        wx.Frame.__init__(self, parent, id, title, size=(380, 230))

        hbox = wx.BoxSizer(wx.HORIZONTAL)
        panel = wx.Panel(self, -1)

        self.list = wx.ListCtrl(panel, -1, style=wx.LC_REPORT)
        self.list.InsertColumn(0, 'name', width=140)
        self.list.InsertColumn(1, 'place', width=130)
        self.list.InsertColumn(2, 'year', wx.LIST_FORMAT_RIGHT, 90)
        for i in packages:
            index = self.list.InsertStringItem(sys.maxint, i[0])
            self.list.SetStringItem(index, 1, i[1])
            self.list.SetStringItem(index, 2, i[2])

        hbox.Add(self.list, 1, wx.EXPAND)
        panel.SetSizer(hbox)

        self.Centre()
        self.Show(True)

app = wx.App()
Actresses(None, -1, 'actresses')
app.MainLoop()
self.list = wx.ListCtrl(panel, -1, style=wx.LC_REPORT)
我们使用 wx.LC_REPORT style 新建了一个 wx.ListCtrl。
        self.list.InsertColumn(0, 'name', width=140)
        self.list.InsertColumn(1, 'place', width=130)
        self.list.InsertColumn(2, 'year', wx.LIST_FORMAT_RIGHT, 90)
上面的代码插入了 3 列,可以单独控制每一列的宽度和格式,默认的格式是 wx.LIST_FORMAT_LEFT。
for i in packages:
    index = self.list.InsertStringItem(sys.maxint, i[0])
    self.list.SetStringItem(index, 1, i[1])
    self.list.SetStringItem(index, 2, i[2])
我们使用两种方法将数据插入到 wx.ListCtrl 中去。对每一行,首先调用 InsertStringItem() 方法,第一个参数为行号,使用 sys.maxint 可以保证每次调用时插入的行在上次插入行之后。该方法返回行的索引值。通过 SetStringItem() 方法可以在当前行的后续列中插入数据。
Mixins
Mixins 是可以增强 wx.ListCtrl 功能的 class。Mixin 类也叫做 helper 类,位于 wx.lib.mixins.listctrl 模块。编码人员必须继承这些类才可使用它们。
2.8.1.1 版本中,有 5 个可用的 mixins:
- wx.ColumnSorterMixin
- wx.ListCtrlAutoWidthMixin
- wx.ListCtrlSelectionManagerMix
- wx.TextEditMixin
- wx.CheckListCtrlMixin
wx.ColumnSorterMixin 可以在 report 试图中允许排序, wx.ListCtrlAutoWidthMixin 可以自动的调整 wx.ListCtrl 最后一列的宽度。默认情况下,最后一列不会占用剩余的空间,参考之前的例子。 wx.ListCtrlSelectionManagerMix 定义了独立于平台的选择策略。wx.TextEditMixin 可以允许文本编辑。wx.CheckListCtrlMixin 为每一行添加一个选择框,这样我们可以进行更多的操作。
下面的代码展示如何使用 ListCtrlAutoWidthMixin。
#!/usr/bin/python

# autowidth.py

import wx
import sys
from wx.lib.mixins.listctrl import ListCtrlAutoWidthMixin

actresses = [('jessica alba', 'pomona', '1981'), ('sigourney weaver', 'new york', '1949'),
    ('angelina jolie', 'los angeles', '1975'), ('natalie portman', 'jerusalem', '1981'),
    ('rachel weiss', 'london', '1971'), ('scarlett johansson', 'new york', '1984' )]


class AutoWidthListCtrl(wx.ListCtrl, ListCtrlAutoWidthMixin):
    def __init__(self, parent):
        wx.ListCtrl.__init__(self, parent, -1, style=wx.LC_REPORT)
        ListCtrlAutoWidthMixin.__init__(self)


class Actresses(wx.Frame):
    def __init__(self, parent, id, title):
        wx.Frame.__init__(self, parent, id, title, size=(380, 230))

        hbox = wx.BoxSizer(wx.HORIZONTAL)

        panel = wx.Panel(self, -1)

        self.list = AutoWidthListCtrl(panel)
        self.list.InsertColumn(0, 'name', width=140)
        self.list.InsertColumn(1, 'place', width=130)
        self.list.InsertColumn(2, 'year', wx.LIST_FORMAT_RIGHT, 90)

        for i in actresses:
            index = self.list.InsertStringItem(sys.maxint, i[0])
            self.list.SetStringItem(index, 1, i[1])
            self.list.SetStringItem(index, 2, i[2])

        hbox.Add(self.list, 1, wx.EXPAND)
        panel.SetSizer(hbox)

        self.Centre()
        self.Show(True)

app = wx.App()
Actresses(None, -1, 'actresses')
app.MainLoop()
我们对前面的例子稍微修改了下。
from wx.lib.mixins.listctrl import ListCtrlAutoWidthMixin
这里我们导入了 mixin。
class AutoWidthListCtrl(wx.ListCtrl, ListCtrlAutoWidthMixin):
    def __init__(self, parent):
        wx.ListCtrl.__init__(self, parent, -1, style=wx.LC_REPORT)
        ListCtrlAutoWidthMixin.__init__(self)
我们创建了一个新的 AutoWidthListCtrl 类,这个类继承自 wx.ListCtrl 和 ListCtrlAutoWidthMixin,这称作多重继承。最后一列会自动改变宽度来占用剩余的空间。

图:自适应宽度例子
在下面的例子中,我们展示如何创建可排序的列。当点击列头时,对应的内容将被排序。
#!/usr/bin/python

# sorted.py

import wx
import sys
from wx.lib.mixins.listctrl import ColumnSorterMixin

actresses = {
1 : ('jessica alba', 'pomona', '1981'),
2 : ('sigourney weaver', 'new york', '1949'),
3 : ('angelina jolie', 'los angeles', '1975'),
4 : ('natalie portman', 'jerusalem', '1981'),
5 : ('rachel weiss', 'london', '1971'),
6 : ('scarlett johansson', 'new york', '1984')
}


class SortedListCtrl(wx.ListCtrl, ColumnSorterMixin):
    def __init__(self, parent):
        wx.ListCtrl.__init__(self, parent, -1, style=wx.LC_REPORT)
        ColumnSorterMixin.__init__(self, len(actresses))
        self.itemDataMap = actresses

    def GetListCtrl(self):
        return self

class Actresses(wx.Frame):
    def __init__(self, parent, id, title):
        wx.Frame.__init__(self, parent, id, title, size=(380, 230))

        hbox = wx.BoxSizer(wx.HORIZONTAL)

        panel = wx.Panel(self, -1)

        self.list = SortedListCtrl(panel)
        self.list.InsertColumn(0, 'name', width=140)
        self.list.InsertColumn(1, 'place', width=130)
        self.list.InsertColumn(2, 'year', wx.LIST_FORMAT_RIGHT, 90)

        items = actresses.items()

        for key, data in items:
            index = self.list.InsertStringItem(sys.maxint, data[0])
            self.list.SetStringItem(index, 1, data[1])
            self.list.SetStringItem(index, 2, data[2])
            self.list.SetItemData(index, key)

        hbox.Add(self.list, 1, wx.EXPAND)
        panel.SetSizer(hbox)

        self.Centre()
        self.Show(True)

app = wx.App()
Actresses(None, -1, 'actresses')
app.MainLoop()
我们仍然使用 actresses 的例子。
ColumnSorterMixin.__init__(self, len(actresses))
ColumnSorterMixin 接受一个参数,即要排序的列的个数。
self.itemDataMap = actresses
必须将我们的数据匹配到 itemDataMap 属性中,且数据类型为字典。
def GetListCtrl(self):
    return self
必须新建一个 GetListCtrl() 方法,它会返回一个将被排序的 wx.ListCtrl 部件。
self.list.SetItemData(index, key)
还需要使用 SetItemData() 方法将每一行与一个 index 关联起来。
Reader
这是一个复杂的例子,使用 report view 展示两个 list control。
#!/usr/bin/python

# reader.py


import wx

articles = [['Mozilla rocks', 'The year of the Mozilla', 'Earth on Fire'],
            ['Gnome pretty, Gnome Slow', 'Gnome, KDE, Icewm, XFCE', 'Where is Gnome heading?'],
            ['Java number one language', 'Compiled languages, intrepreted Languages', 'Java on Desktop?']]


class ListCtrlLeft(wx.ListCtrl):
    def __init__(self, parent, id):
        wx.ListCtrl.__init__(self, parent, id, style=wx.LC_REPORT | wx.LC_HRULES |
		wx.LC_NO_HEADER | wx.LC_SINGLE_SEL)
        images = ['icons/java.png', 'icons/gnome.png', 'icons/mozilla.png']

        self.parent = parent

        self.Bind(wx.EVT_SIZE, self.OnSize)
        self.Bind(wx.EVT_LIST_ITEM_SELECTED, self.OnSelect)

        self.il = wx.ImageList(32, 32)
        for i in images:
            self.il.Add(wx.Bitmap(i))

        self.SetImageList(self.il, wx.IMAGE_LIST_SMALL)
        self.InsertColumn(0, '')

        for i in range(3):
            self.InsertStringItem(0, '')
            self.SetItemImage(0, i)

    def OnSize(self, event):
        size = self.parent.GetSize()
        self.SetColumnWidth(0, size.x-5)
        event.Skip()

    def OnSelect(self, event):
        window = self.parent.GetGrandParent().FindWindowByName('ListControlOnRight')
        index = event.GetIndex()
        window.LoadData(index)

    def OnDeSelect(self, event):
        index = event.GetIndex()
        self.SetItemBackgroundColour(index, 'WHITE')

    def OnFocus(self, event):
        self.SetItemBackgroundColour(0, 'red')

class ListCtrlRight(wx.ListCtrl):
    def __init__(self, parent, id):
        wx.ListCtrl.__init__(self, parent, id, style=wx.LC_REPORT | wx.LC_HRULES |
		wx.LC_NO_HEADER | wx.LC_SINGLE_SEL)

        self.parent = parent

        self.Bind(wx.EVT_SIZE, self.OnSize)

        self.InsertColumn(0, '')


    def OnSize(self, event):
        size = self.parent.GetSize()
        self.SetColumnWidth(0, size.x-5)
        event.Skip()

    def LoadData(self, index):
        self.DeleteAllItems()
        for i in range(3):
            self.InsertStringItem(0, articles[index][i])


class Reader(wx.Frame):
    def __init__(self, parent, id, title):
        wx.Frame.__init__(self, parent, id, title)

        hbox = wx.BoxSizer(wx.HORIZONTAL)
        splitter = wx.SplitterWindow(self, -1, style=wx.SP_LIVE_UPDATE|wx.SP_NOBORDER)

        vbox1 = wx.BoxSizer(wx.VERTICAL)
        panel1 = wx.Panel(splitter, -1)
        panel11 = wx.Panel(panel1, -1, size=(-1, 40))
        panel11.SetBackgroundColour('#53728c')
        st1 = wx.StaticText(panel11, -1, 'Feeds', (5, 5))
        st1.SetForegroundColour('WHITE')

        panel12 = wx.Panel(panel1, -1, style=wx.BORDER_SUNKEN)
        vbox = wx.BoxSizer(wx.VERTICAL)
        list1 = ListCtrlLeft(panel12, -1)

        vbox.Add(list1, 1, wx.EXPAND)
        panel12.SetSizer(vbox)
        panel12.SetBackgroundColour('WHITE')


        vbox1.Add(panel11, 0, wx.EXPAND)
        vbox1.Add(panel12, 1, wx.EXPAND)

        panel1.SetSizer(vbox1)

        vbox2 = wx.BoxSizer(wx.VERTICAL)
        panel2 = wx.Panel(splitter, -1)
        panel21 = wx.Panel(panel2, -1, size=(-1, 40), style=wx.NO_BORDER)
        st2 = wx.StaticText(panel21, -1, 'Articles', (5, 5))
        st2.SetForegroundColour('WHITE')

        panel21.SetBackgroundColour('#53728c')
        panel22 = wx.Panel(panel2, -1, style=wx.BORDER_RAISED)
        vbox3 = wx.BoxSizer(wx.VERTICAL)
        list2 = ListCtrlRight(panel22, -1)
        list2.SetName('ListControlOnRight')
        vbox3.Add(list2, 1, wx.EXPAND)
        panel22.SetSizer(vbox3)


        panel22.SetBackgroundColour('WHITE')
        vbox2.Add(panel21, 0, wx.EXPAND)
        vbox2.Add(panel22, 1, wx.EXPAND)

        panel2.SetSizer(vbox2)

        toolbar = self.CreateToolBar()
        toolbar.AddLabelTool(1, 'Exit', wx.Bitmap('icons/stock_exit.png'))
        toolbar.Realize()

        self.Bind(wx.EVT_TOOL, self.ExitApp, id=1)

        hbox.Add(splitter, 1, wx.EXPAND | wx.TOP | wx.BOTTOM, 5)
        self.SetSizer(hbox)
        self.CreateStatusBar()
        splitter.SplitVertically(panel1, panel2)
        self.Centre()
        self.Show(True)


    def ExitApp(self, event):
        self.Close()


app = wx.App()
Reader(None, -1, 'Reader')
app.MainLoop()
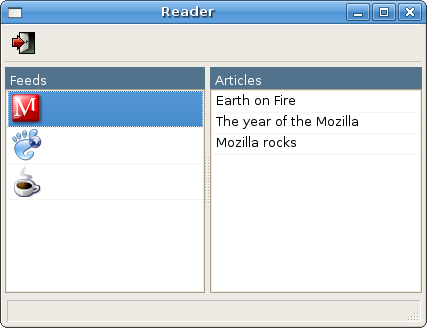
上面的例子展示了一个 report 试图的 wx.ListCtrl。没有 headers,我们需要新建自己的 headers。该应用中有两个 wx.ListCtrl 分别位于左侧和右侧。
splitter = wx.SplitterWindow(self, -1, style=wx.SP_LIVE_UPDATE|wx.SP_NOBORDER)
...
splitter.SplitVertically(panel1, panel2)
splitter 将主窗口竖直划分为两个部分,这两个 panel 各自又有两个 panel,分别作 Feeds 和 Articles 的 headers,剩余的空间则作为 listctrl 的位置。
list2 = ListCtrlRight(panel22, -1)
list2.SetName('ListControlOnRight')
我们给 ListCtrlRight 一个名字“ListControlOnRight”,因为后续我们需要两个部件的交互。
def OnSelect(self, event):
    window = self.parent.GetGrandParent().FindWindowByName('ListControlOnRight')
    index = event.GetIndex()
    window.LoadData(index)
上面的代码位于 ListCtrlLeft 类中,我们定位了 ListCtrlRight 部件,并调用它的 LoadData() 方法。
def LoadData(self, index):
    self.DeleteAllItems()
    for i in range(3):
        self.InsertStringItem(0, articles[index][i])
LoadData() 方法首先清除所有的条目,然后从全局定义的文章列表中插入文章名,index 同时也被传入。
def OnSize(self, event):
    size = self.parent.GetSize()
    self.SetColumnWidth(0, size.x-5)
    event.Skip()
两个 wx.ListCtrl 都只有一列,这里我们让列宽度与父部件的宽度一致,否则界面将不太好看为什么要减去 5px 呢?这是一个神奇数字,如果我们减 5px,水平的滚动条就不会出现。在其他平台上,该数字可能会有变化。

图:Reader
CheckListCtrl
应用中经常会看到在一个列表部件中出现单选框,比如打包应用 Synaptic 或者 KYUM。
从编程者的思维出发,这些单选框只是简单的图片,有两种不同的状态:选择、未选择,对应两种不同的图片。我们无需亲自去实现上述功能,这已经在 CheckListCtrlMixin 中被实现。
#!/usr/bin/python

# repository.py

import wx
import sys
from wx.lib.mixins.listctrl import CheckListCtrlMixin, ListCtrlAutoWidthMixin

packages = [('abiword', '5.8M', 'base'), ('adie', '145k', 'base'),
    ('airsnort', '71k', 'base'), ('ara', '717k', 'base'), ('arc', '139k', 'base'),
    ('asc', '5.8M', 'base'), ('ascii', '74k', 'base'), ('ash', '74k', 'base')]

class CheckListCtrl(wx.ListCtrl, CheckListCtrlMixin, ListCtrlAutoWidthMixin):
    def __init__(self, parent):
        wx.ListCtrl.__init__(self, parent, -1, style=wx.LC_REPORT | wx.SUNKEN_BORDER)
        CheckListCtrlMixin.__init__(self)
        ListCtrlAutoWidthMixin.__init__(self)


class Repository(wx.Frame):
    def __init__(self, parent, id, title):
        wx.Frame.__init__(self, parent, id, title, size=(450, 400))

        panel = wx.Panel(self, -1)

        vbox = wx.BoxSizer(wx.VERTICAL)
        hbox = wx.BoxSizer(wx.HORIZONTAL)

        leftPanel = wx.Panel(panel, -1)
        rightPanel = wx.Panel(panel, -1)

        self.log = wx.TextCtrl(rightPanel, -1, style=wx.TE_MULTILINE)
        self.list = CheckListCtrl(rightPanel)
        self.list.InsertColumn(0, 'Package', width=140)
        self.list.InsertColumn(1, 'Size')
        self.list.InsertColumn(2, 'Repository')

        for i in packages:
            index = self.list.InsertStringItem(sys.maxint, i[0])
            self.list.SetStringItem(index, 1, i[1])
            self.list.SetStringItem(index, 2, i[2])

        vbox2 = wx.BoxSizer(wx.VERTICAL)

        sel = wx.Button(leftPanel, -1, 'Select All', size=(100, -1))
        des = wx.Button(leftPanel, -1, 'Deselect All', size=(100, -1))
        apply = wx.Button(leftPanel, -1, 'Apply', size=(100, -1))


        self.Bind(wx.EVT_BUTTON, self.OnSelectAll, id=sel.GetId())
        self.Bind(wx.EVT_BUTTON, self.OnDeselectAll, id=des.GetId())
        self.Bind(wx.EVT_BUTTON, self.OnApply, id=apply.GetId())

        vbox2.Add(sel, 0, wx.TOP, 5)
        vbox2.Add(des)
        vbox2.Add(apply)

        leftPanel.SetSizer(vbox2)

        vbox.Add(self.list, 1, wx.EXPAND | wx.TOP, 3)
        vbox.Add((-1, 10))
        vbox.Add(self.log, 0.5, wx.EXPAND)
        vbox.Add((-1, 10))

        rightPanel.SetSizer(vbox)

        hbox.Add(leftPanel, 0, wx.EXPAND | wx.RIGHT, 5)
        hbox.Add(rightPanel, 1, wx.EXPAND)
        hbox.Add((3, -1))

        panel.SetSizer(hbox)

        self.Centre()
        self.Show(True)

    def OnSelectAll(self, event):
        num = self.list.GetItemCount()
        for i in range(num):
            self.list.CheckItem(i)

    def OnDeselectAll(self, event):
        num = self.list.GetItemCount()
        for i in range(num):
            self.list.CheckItem(i, False)

    def OnApply(self, event):
        num = self.list.GetItemCount()
        for i in range(num):
            if i == 0: self.log.Clear()
            if self.list.IsChecked(i):
                self.log.AppendText(self.list.GetItemText(i) + '\n')

app = wx.App()
Repository(None, -1, 'Repository')
app.MainLoop()

图:Repository
class CheckListCtrl(wx.ListCtrl, CheckListCtrlMixin, ListCtrlAutoWidthMixin):
    def __init__(self, parent):
        wx.ListCtrl.__init__(self, parent, -1, style=wx.LC_REPORT | wx.SUNKEN_BORDER)
        CheckListCtrlMixin.__init__(self)
        ListCtrlAutoWidthMixin.__init__(self)
wxPython 允许多重继承,这里我们继承了 3 个不同的类。
def OnSelectAll(self, event):
    num = self.list.GetItemCount()
    for i in range(num):
        self.list.CheckItem(i)
在上面的代码中,我们看到了多重继承的实际操作。对 self.list 对象,我们调用了 2 个来自不同类的方法, GetItemCount() 方法来源于 CheckListCtrl 类,CheckItem() 方法来源于 CheckListCtrlMixin 类。
在本节中,我们讲解了多个 wxPython 的高级部件。
老师您好,wx.ListCtrl 部件介绍内容的简单例子的代码中,第21行运行时报错:AttributeError: module ‘sys’ has no attribute ‘maxint’。网查资料sys.maxint以被弃用,但没找到能代替解决的方法。往能指教释疑,万分感谢!
您好,上面反映咨询的问题已自行找到方法解决,sys.maxint用self.list.GetItemCount ( )代替,4.0.4版本中运行代码提示以InsertItem( )和SetItem ( )代替 InsertStringItem ( ) 和SetStringItem ( )。教程有点老了,但仍然再次感谢您的分享,让我者业余小白有机会比较系统的学习,谢谢!